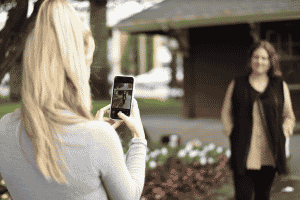
When just starting out, photography can seem pretty daunting. With these four tips, we hope to help you figure out where to start, and how to advance your photography skills!
Get To Know Your Camera:
Whether you are using a Nikon 750, a Canon Power Shot, or your iPhone 13, it’s essential to get to know your camera.
When it comes to traditional DSLRs, there are many different settings that come with your camera. While it might seem tedious, going through the manual that comes with your camera is the best first step. For the first little while, it will probably be most convenient for you to shoot in A (Automatic). Once you’re feeling more comfortable switch to M (Manual) and try experimenting with the ISO, Exposure, and Aperture. When I first began learning, reading blogs like this, watching youtube videos, and investing in my education through online courses were critical to my success in creating clear, well-lit images. Nailing your ISO, Exposure, and Aperture to work harmoniously will help you succeed in creating clear, well-lit images in any lighting.
Nail Your Lighting:
As I mentioned above, it’s important to have all of your settings working in harmony to have your camera capturing images properly. Aside from settings, lighting plays a huge role in how your camera will capture an image. I am a huge lover of natural light in any scenario I can make it work.
When shooting under artificial light, the light can cause your camera to flicker. Flicker causes intermittent flashing and banding on your images, which can cause trouble when you are post-processing and editing your images. To avoid this, when possible, if you are shooting indoors try turning off all artificial light sources and opening up all window blinds to let in as much natural light as possible.
When shooting outdoors, the most common complaint is usually over-exposure from the sun being too bright. To avoid this, your best bet is to strategically plan your shooting times to offer you better light conditions. A few hours post sunrise and a few hours before sunset are the two best times of day to shoot outdoors for good lighting conditions. From there, working in tandem with your settings you should be able to capture well-lit, sharp images.
If you do find yourself in a situation where you have very bright, direct sunlight on your subject, this is where you will find your knowledge of your camera settings comes in handy. Make time to shoot in all lighting conditions, morning, afternoon, and night. Use this time to play around with your ISO, Exposure, and Aperture to figure out what your sweet spots are for easy reference in future shoots.
Develop Your Style:
Developing your style is a key element to creating great photographs. Take into consideration what you are taking photos for, if you’re taking images for your brand or business, think about the style and vibe of your brand. What would best represent it? Light and airy? Dark and moody? Warm? Whatever the vibe is, use it to direct your posing, lighting, and most importantly, your editing.
When it comes to photography, consistency is everything. If your audience can look at a photo, and know you took it without even seeing your name, you know you have a strong sense of style. When editing your photos, take time to find or develop a preset to use so you always have a consistent colouring and editing style. This makes your photos flow so they look polished when sharing or printing them. Even if you are just using your iPhone to create content and take photos, it’s essential to find an editing app you can use with a filter or preset you like to make your images consistent. At Red Toque, we developed our own preset that we use to edit our Instagram photos to make our feed look cohesive.
Commit To The Shot:
My final piece of advice is to commit to the shot, and have fun with it! Get on the ground, try crazy angles, get really close, go far away, just get weird and experiment. Keep trying new things, and as long as you’re having fun, that’s all that really matters.


